There’s something magical about pulling a pan of freshly baked brownies out of the oven. The aroma of melted chocolate fills the kitchen, the top develops that beautiful shiny crackle, and every bite delivers a rich, fudgy center that practically melts in your mouth.
If you’ve relied on boxed brownie mixes in the past, this recipe may completely change your mind. These fudgy brownies from scratch are easy to make, require simple pantry ingredients, and deliver a deep chocolate flavor that tastes like it came straight from a professional bakery.
Whether you’re baking for a family gathering, a birthday celebration, a weekend treat, or simply satisfying a serious chocolate craving, this recipe creates brownies with the perfect balance of chewiness, richness, and intense chocolate goodness.
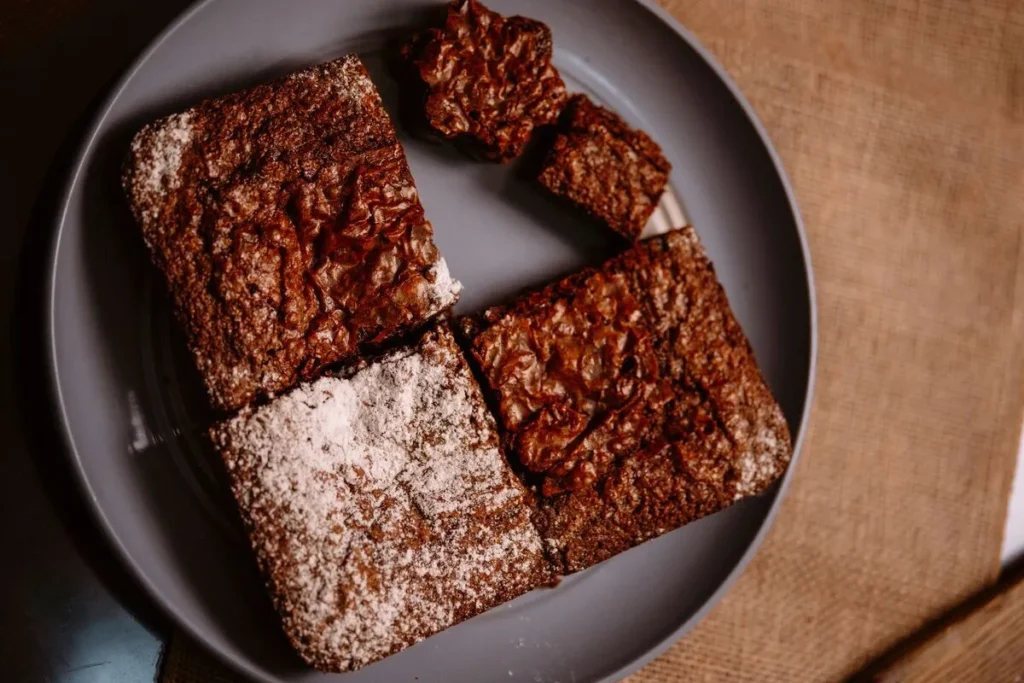
Table of Contents
Why You’ll Love These Fudgy Brownies
- Rich chocolate flavor made with real ingredients
- Dense, moist, and perfectly fudgy texture
- Easy one-bowl preparation
- Made with everyday pantry staples
- Beautiful crackly brownie top
- Beginner-friendly and foolproof
- Great for parties, holidays, and bake sales
Recipe Information
| Details | Time |
|---|---|
| Prep Time | 15 Minutes |
| Cook Time | 30 Minutes |
| Total Time | 45 Minutes |
| Servings | 16 Brownies |
| Difficulty | Easy |
Ingredients
Dry Ingredients
- 1 cup (125g) all-purpose flour
- ¾ cup (75g) unsweetened cocoa powder
- ½ teaspoon salt
Wet Ingredients
- 1 cup (226g) unsalted butter, melted
- 1¼ cups (250g) granulated sugar
- ¾ cup (150g) brown sugar
- 3 large eggs, room temperature
- 2 teaspoons pure vanilla extract
Chocolate
- 1 cup (170g) semi-sweet chocolate chips or chopped chocolate
How to Make Fudgy Brownies from Scratch
Step 1: Prepare the Pan
Preheat your oven to 350°F (175°C).
Line an 8×8-inch baking pan with parchment paper, leaving extra paper hanging over the sides for easy removal after baking.
Step 2: Mix the Wet Ingredients
In a large mixing bowl, whisk together:
- Melted butter
- Granulated sugar
- Brown sugar
Whisk for about one minute until smooth and glossy.
Add the eggs one at a time, whisking well after each addition. Stir in the vanilla extract.
The mixture should appear silky, thick, and slightly glossy.
Step 3: Add the Dry Ingredients
In a separate bowl, combine:
- Flour
- Cocoa powder
- Salt
Gradually fold the dry ingredients into the wet mixture using a spatula.
Mix only until combined. Overmixing can create a cake-like texture instead of a fudgy one.
Step 4: Add the Chocolate
Fold in the chocolate chips or chopped chocolate.
These create delicious pockets of melted chocolate throughout the brownies.
Step 5: Bake
Spread the batter evenly into the prepared baking pan.
Bake for 28–32 minutes, or until a toothpick inserted near the center comes out with a few moist crumbs attached.
Avoid waiting for a completely clean toothpick, as this usually means the brownies are overbaked.
Step 6: Cool and Slice
Allow the brownies to cool completely in the pan.
For cleaner slices, refrigerate them for 30 minutes before cutting.
Slice into 16 squares and enjoy.
What Makes These Brownies Better Than Boxed?
Rich Chocolate Flavor
Using real cocoa powder and chocolate creates a deeper, more authentic chocolate taste than most packaged mixes.
Perfect Fudgy Texture
These brownies stay dense and chewy with a moist center, while many boxed versions tend to be more cake-like.
No Artificial Ingredients
You control every ingredient that goes into the batter, resulting in fresher flavor and better quality.
Easy to Customize
Add your favorite mix-ins to create a unique brownie every time.
Pro Baking Tips
Use Room-Temperature Eggs
Room-temperature eggs blend more easily into the batter and help create a smoother texture.
Measure Flour Correctly
Too much flour is one of the biggest reasons brownies turn out dry. Spoon flour into the measuring cup and level it off.
Don’t Overmix
Once the flour is added, stir only until the ingredients are combined.
Check Early
Every oven bakes differently. Start checking your brownies around the 28-minute mark.
Let Them Cool
Brownies continue setting as they cool. Patience results in better texture and cleaner slices.
Common Mistakes to Avoid
Overbaking
This is the number one reason brownies become dry. Remove them while the center is still slightly soft.
Using Cold Ingredients
Cold eggs can affect mixing and texture.
Skipping Parchment Paper
Parchment paper makes removing brownies from the pan much easier.
Using Low-Quality Cocoa
Since chocolate is the star ingredient, quality cocoa powder makes a noticeable difference.
Cutting Too Soon
Warm brownies may fall apart when sliced. Allow them to cool completely.
Variations and Substitutions
Walnut Brownies
Fold in ¾ cup chopped walnuts for added crunch and flavor.
Double Chocolate Brownies
Add an extra ½ cup of chocolate chips for an even richer dessert.
Espresso Brownies
Add 1 teaspoon of espresso powder to enhance the chocolate flavor.
Salted Caramel Brownies
Swirl caramel sauce into the batter before baking and sprinkle with flaky sea salt after baking.
Gluten-Free Brownies
Use a high-quality 1:1 gluten-free baking flour blend in place of all-purpose flour.
Serving Suggestions
These brownies are delicious on their own, but they become even more irresistible when served with:
- Vanilla ice cream
- Fresh strawberries
- Whipped cream
- Chocolate ganache
- Caramel drizzle
- Cold milk
- Fresh coffee
The combination of warm brownies and cold ice cream creates an unforgettable dessert experience.
Storage Instructions
Room Temperature
Store in an airtight container for up to 4 days.
Refrigerator
Store for up to 1 week.
Freezer
Wrap individual brownies tightly and freeze for up to 3 months.
Thaw at room temperature before serving.
Nutrition Facts (Per Serving Approximate)
| Nutrient | Amount |
|---|---|
| Calories | 245 |
| Carbohydrates | 30g |
| Protein | 3g |
| Fat | 13g |
| Saturated Fat | 8g |
| Sugar | 22g |
| Fiber | 2g |
| Sodium | 90mg |
Nutrition values are estimates and may vary depending on the ingredients used.
Frequently Asked Questions
Why are my brownies cakey instead of fudgy?
Too much flour, overmixing, or overbaking can result in a cakey texture. Measure ingredients carefully and avoid overbaking.
Can I use dark chocolate instead of semi-sweet chocolate?
Yes. Dark chocolate creates a richer and more intense chocolate flavor.
How do I get a shiny crackly top?
Whisking the butter, sugars, and eggs thoroughly helps create the signature glossy top.
Can I double this recipe?
Absolutely. Use a 9×13-inch baking pan and increase baking time by approximately 5–10 minutes.
Do brownies taste better the next day?
Many bakers agree they do. The flavors deepen, and the texture becomes even fudgier after resting overnight.
Why This Recipe Works
The secret to truly exceptional fudgy brownies from scratch is balancing butter, sugar, chocolate, and flour correctly.
The melted butter creates richness, brown sugar adds moisture and chewiness, cocoa powder delivers deep chocolate flavor, and the chocolate chips create pockets of melted goodness throughout every bite.
The result is a brownie with chewy edges, a crackly top, and an irresistibly fudgy center that rivals your favorite bakery.
Final Thoughts
If you’ve been searching for the perfect fudgy brownies from scratch, this recipe deserves a permanent place in your baking collection. With its rich chocolate aroma, crackly top, chewy edges, and deeply fudgy center, it proves that homemade brownies can easily outperform any boxed mix.
Whether you’re baking for family, friends, or simply treating yourself, these brownies are guaranteed to disappear fast.
What’s your favorite brownie add-in—walnuts, caramel, chocolate chips, peanut butter, or something unique?
If you try this recipe, leave a comment below and share your results. We’d love to hear how your brownies turned out.
Don’t forget to share this recipe with fellow chocolate lovers and save it for your next baking day!