Bibimbap literally means “mixed rice,” and that name gives away the whole method: a bowl of warm rice topped with an assortment of seasoned vegetables, a protein, and a spoonful of gochujang (Korean red chili paste), all stirred together right before eating. It looks elaborate on a restaurant menu, but the actual cooking is mostly just sautéing a handful of vegetables one at a time — nothing that requires advanced technique. This guide breaks the process into manageable stages so a first-time cook can follow along without feeling overwhelmed.
If you enjoyed the sweet-and-savory balance in our Moroccan Chicken Tagine, bibimbap offers a similar idea of many small flavors coming together in one dish — just with a completely different set of spices.
What You’ll Need
Equipment:
- A large nonstick skillet or wok
- A small saucepan (for rice)
- A mixing bowl for each vegetable (optional, but keeps things organized)
- Tongs or chopsticks for arranging toppings
Ingredients (serves 2):
- 1 cup short-grain white rice, cooked
- 1 cup spinach, blanched
- 1 cup bean sprouts, blanched
- 1 carrot, julienned
- 1 zucchini, julienned
- 4–6 shiitake mushrooms, sliced
- 2 eggs
- ½ lb ground beef or thinly sliced ribeye
- 2 tbsp soy sauce
- 1 tbsp sesame oil, plus more for cooking
- 1 clove garlic, minced
- 2–3 tbsp gochujang (Korean chili paste)
- Toasted sesame seeds, for garnish
- Vegetable oil, for sautéing
Beginner tip: Gochujang is the one ingredient that’s hard to substitute — it has a fermented depth that regular chili sauce doesn’t replicate. It’s sold in most well-stocked grocery stores and any Asian market, usually in a red tub near the soy sauce and miso.
Before You Start Cooking
Bibimbap is a dish of small, repeated steps rather than one complicated technique — you’ll sauté several vegetables individually, each for just a few minutes. Prepping every vegetable (washing, peeling, julienning) before you turn on the stove will make the actual cooking go much faster, since each vegetable only takes 2–3 minutes in the pan.
Step 1: Cook the Rice
Rinse the rice under cold water until the water runs mostly clear — this removes excess starch and keeps the rice from turning gummy. Cook according to the package instructions, or in a rice cooker if you have one. Set aside, covered, to keep warm.
Step 2: Prepare the Vegetables One at a Time
Working with one vegetable at a time keeps the flavors distinct, which is part of what makes bibimbap taste balanced rather than muddled.
- Spinach: Blanch in boiling water for about 30 seconds, then rinse under cold water and squeeze out the excess liquid. Toss with a small drizzle of sesame oil and a pinch of salt.
- Bean sprouts: Blanch for 2–3 minutes until just tender, then season the same way as the spinach.
- Carrot: Sauté in a lightly oiled pan over medium heat for 2–3 minutes until just softened, with a pinch of salt.
- Zucchini: Sauté the same way as the carrot, keeping the vegetables slightly crisp rather than fully soft.
- Mushrooms: Sauté with a touch of soy sauce and garlic until browned, about 3–4 minutes.
Beginner tip: Wipe out the pan (or use a paper towel) between vegetables. This keeps flavors from bleeding into each other and is a small habit that makes a noticeable difference in the final dish.
Step 3: Cook the Beef
Season the beef with 1 tablespoon of soy sauce, a drizzle of sesame oil, and the minced garlic. Sauté in a hot pan for 4–5 minutes, until browned and cooked through. If using ground beef, break it up as it cooks; if using sliced ribeye, sear briefly on each side.
Step 4: Fry the Eggs
In a separate pan, fry the eggs sunny-side up, keeping the yolk runny. The warm yolk mixes into the rice later and helps bind everything together — this is a traditional and important part of the dish, not just a garnish.
Food safety note: If you’re serving this to someone pregnant, elderly, or with a compromised immune system, cook the egg through completely rather than leaving the yolk runny.
Step 5: Assemble the Bowl
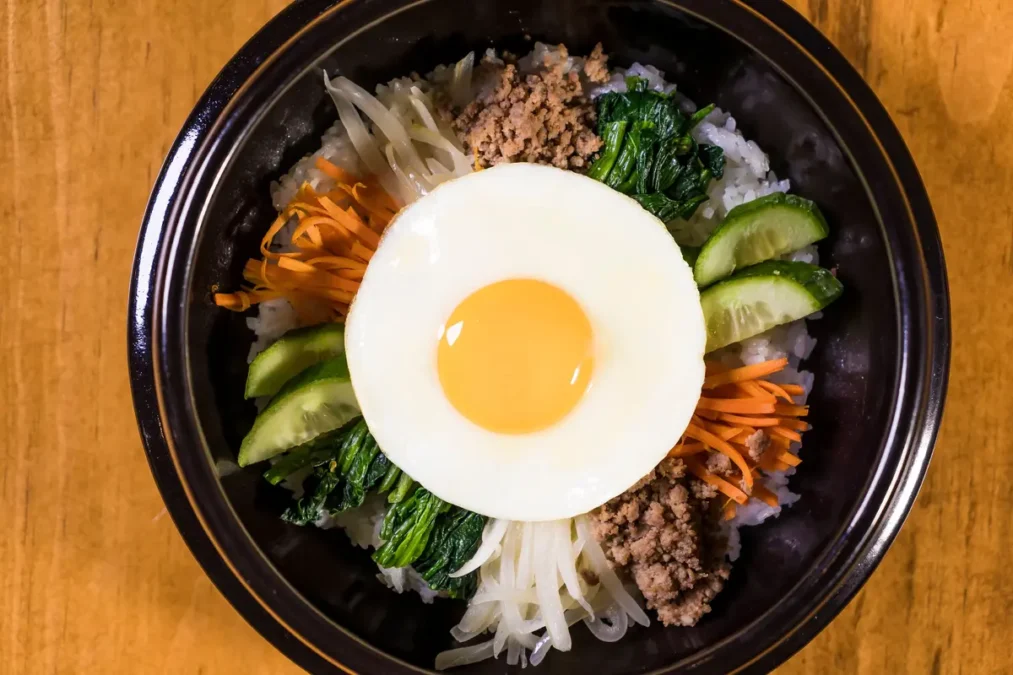
Divide the warm rice between two bowls. Arrange the vegetables and beef in separate sections around the edge of the bowl, rather than mixing them in the pan — this is the traditional presentation and also makes the colors pop. Place the fried egg in the center, add a spoonful of gochujang on top, and sprinkle with toasted sesame seeds.
To eat, stir everything together thoroughly right at the table so the rice, sauce, and yolk coat every bite evenly.
Common Beginner Mistakes to Avoid
- Overcooking the vegetables — they should stay slightly crisp, not mushy, so each one keeps its own texture
- Skipping the individual seasoning step — seasoning each vegetable separately (rather than all at once) is what gives bibimbap its layered flavor
- Using too much gochujang at first — it’s spicy and salty; start with less and add more once mixed
- Not rinsing the rice — unrinsed rice can turn the dish gummy instead of fluffy
- Mixing the bowl before serving — part of the appeal is the visual presentation, so stir at the table, not in the kitchen
A Note on Nutrition
A typical bibimbap bowl runs somewhere in the 500–700 calorie range depending on the protein and rice portion, and it’s generally well balanced — combining carbohydrates from rice, protein from the beef and egg, and fiber and vitamins from the mix of vegetables. It also tends to be higher in sodium due to the soy sauce and gochujang, so if you’re watching sodium intake, start with less of both and adjust to taste. For general guidance on building balanced meals like this one, the USDA MyPlate guidelines are a useful reference.
Frequently Asked Questions
Can I make bibimbap vegetarian?
Yes — swap the beef for extra-firm tofu, pan-fried until golden, or simply add more mushrooms and vegetables.
What can I use instead of gochujang?
There’s no perfect substitute, but a mix of sriracha and a small amount of white miso can approximate the sweet-spicy-fermented flavor in a pinch.
Do I need a hot stone bowl (dolsot)?
No. A stone bowl is traditional for creating crispy rice at the bottom, but a regular bowl works fine for a home version — you just won’t get that crispy layer.
Can I meal prep the components ahead of time? Yes, and this is actually a great make-ahead dish. Cook and season each vegetable, store separately in the fridge for up to 3 days, then assemble fresh with a freshly fried egg when ready to eat.
If you liked exploring Korean flavors, you might also enjoy our Japanese Oyakodon: Comforting Chicken and Egg Bowl, or if you’re in the mood for something different entirely, try our Beyond the Taco: Salvadoran Pupusas. or Lebanese Hummus and Falafel Plate